Korean Mochi Bread
Update: I actually made some changes to the recipe. Originally I used tapioca starch for the Korean Mochi Bread but I found Cassava flour which worked so much better.
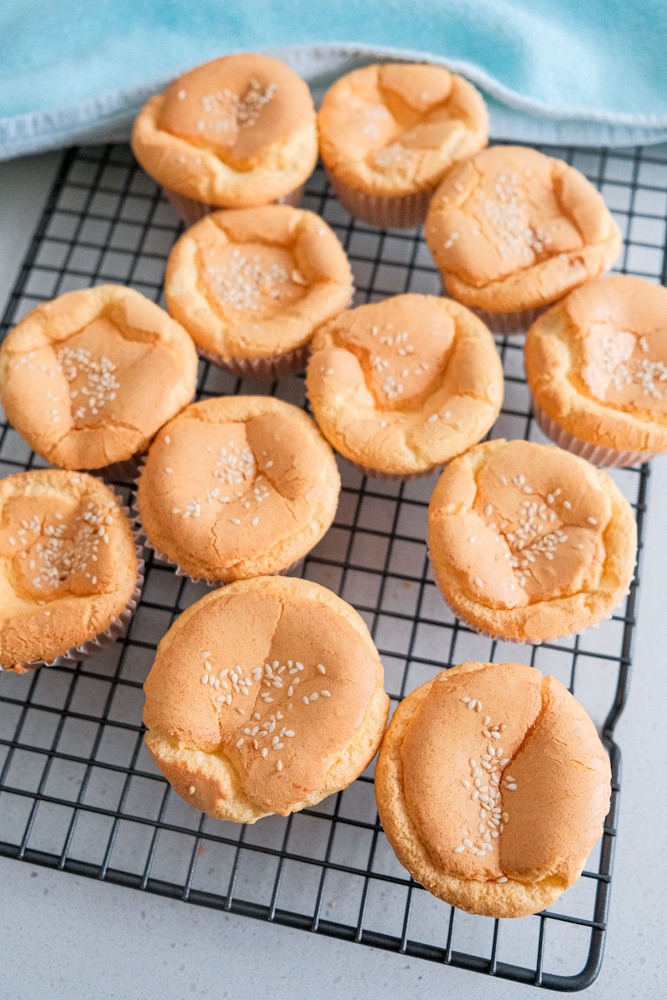
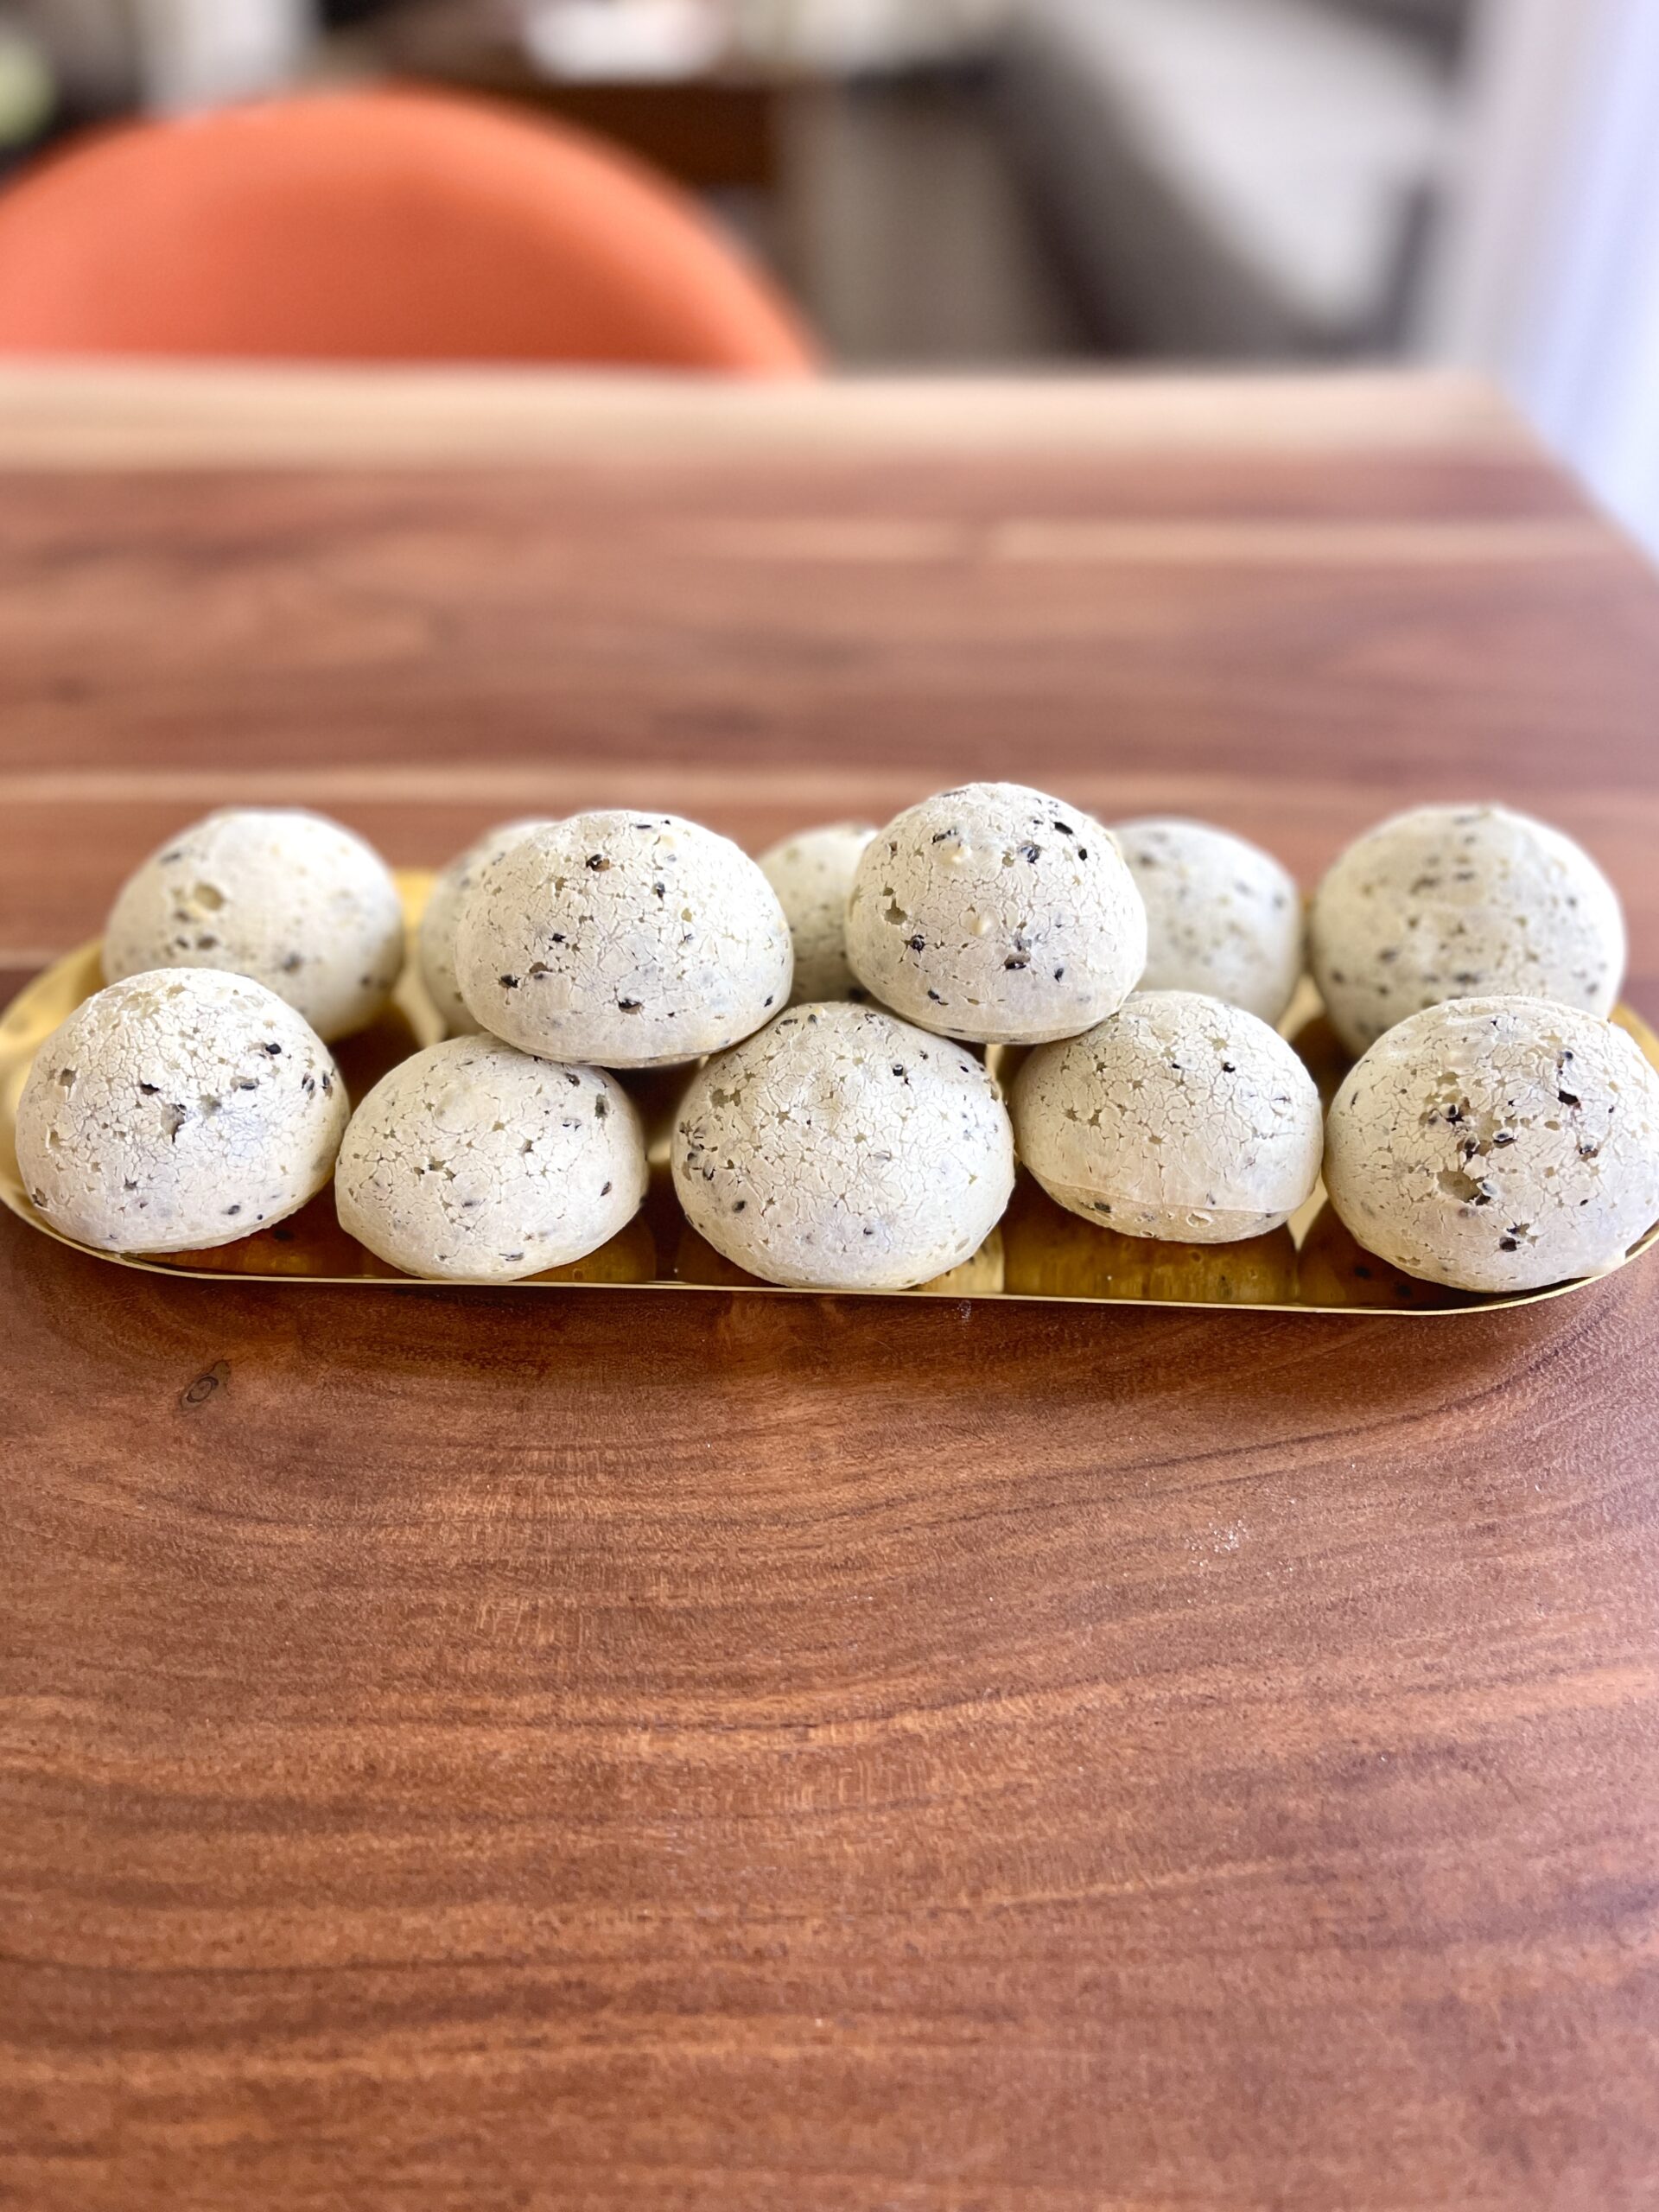
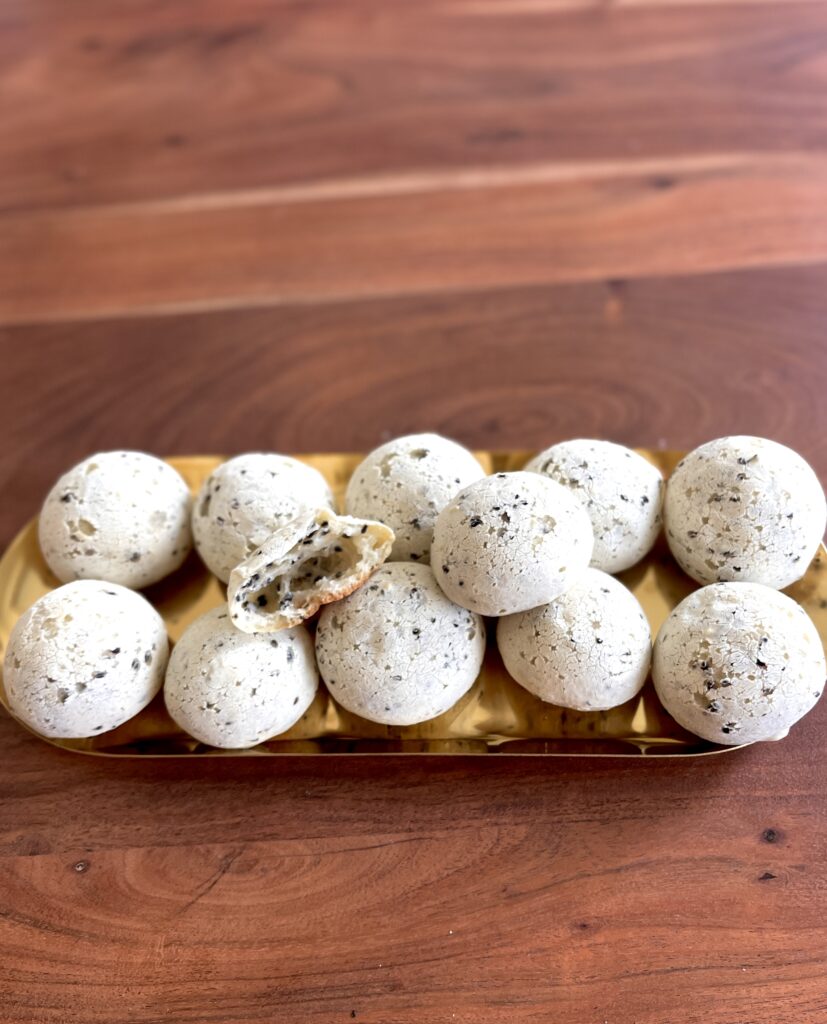
If you haven’t already guessed it, I love desserts that are bit chewy and slightly sweet. This sesame Mochi bread is definitely up my alley. I’ve seen these been sold in Korean supermarkets. They are usually big and when you bit into them, it’s chewy with hollow interior. This makes for an airy bread and doesn’t feel very heavy when eating. They are slightly sweetened and are considered more of a dessert than a bread.
I thought mochi bread would be easy to make!
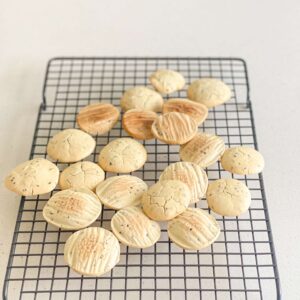
This recipe took me a while to figure out. I started off using glutinous rice flour because it made sense that it would be called Mochi if I’m using rice flour. However, the bread was dry, hard and not as airy. I did a bit of research and I found most recommended to use tapioca starch/flour instead. I made it and didn’t turn out the way I wanted it. It was still dense and not airy. You can see below how deflated they are.
Finally figured it out
After some soul searching research, I finally figured out how to make these mochi bread. You have to add flour and cook the flour into a thick paste which will help with the airy texture. I also changed the flour into cassava flour and thought it would be a better alternative to tapioca starch. Thus, the cassava flour is added to the flour roux then the eggs slowly. The resulting mixture is a paste which you have to pipe it onto a baking tray. The tricky part about this recipe is adding the eggs. You don’t want to add the eggs at once because you want enough so that it can form a thick batter. Once you get the right batter consistency, it’s so easy to make it and addicting! I decided to keep it simple and put sesame seeds only but you can add cocoa powder as well. Below I’m going to show you my pro tips on how I succeeded in making these.
Pro Tip
- Heat the liquids up until it’s boiling and then take it off the heat to add the flour.
- Sift your flour
- Stir until there are no lumps in it and the flour mixture is like thick roux.
- Once you add in tapioca starch, it will look very dry, don’t worry, once the egg is added, the mixture will become more runny
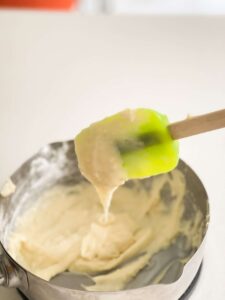
- The final mixture should be thick. The mixture will drop down off a spatula but will take 3-5s to drop
- Cool the mochi bread in the oven with it turned off.
- If eating it later, microwave for 20-30s before eating.
- Space your mochi bread evenly and don’t put too many on a baking tray or else you might have to bake it for longer time. The bread puffs up because the moisture is being drawn out so having the mochi bread too close together will affect its baking time as it doesn’t puff up in the required time
- if you double the recipe or make bigger mochi bread, add about 5-10 minutes of baking time.
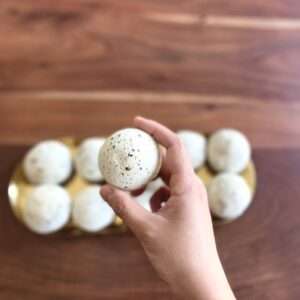
Sesame Mochi Bread
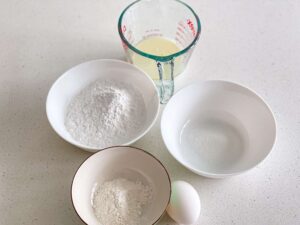
Ingredients
- 100 ml 2% milk
- 20 g neutral oil
- 20 g sugar
- 20 g all purpose flour sifted
- 100 g cassava flour
- 1 egg
- 10 g black sesame seeds
Instructions
- Preheat the oven to 350℉. Line a baking tray with silicone or parchment paper
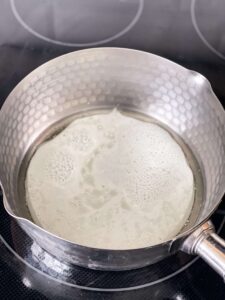
- Weigh out all ingredients. Pour milk, oil and sugar into a pot and bring it to a boil on medium heat
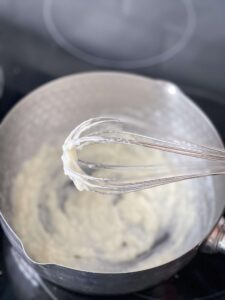
- once the mixture is starting to bubble, turn off heat and put in your flour
- whisk until all the flour is combined and forms a roux
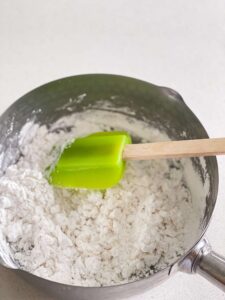
- Add in the cassava flour and mix. You will end up with pretty lumpy mixture
- Beat one egg and add to the mixture slowly while folding the egg into the mixture
- Make sure to press against the pot to get rid of any lumps. You should get a pretty thick mixture
- Mix in the sesame seeds.
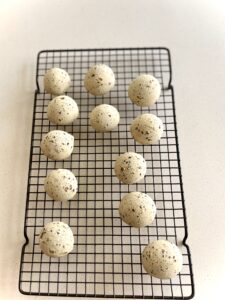
- Put into a pastry bag and get rid of any excess air. Cut the tip off and pipe the mixture onto the baking tray 1 inch disc. It should give you 12.
- Wet your finger with water and flatten the tip.
- Place into the oven for 30 minutes.
- Let it cool in the oven before eating. It should be pretty chewy and slightly sweet.
- Seal in a ziploc bag and refrigerate it. Heat it up in microwave to eat after.